Hi, it is Nathaniel writing here. I hope everyone is doing well while staying at home. I know that I would rather be outside and taking photos, but in this blog post, I will share a little bit about doing some product photography while stuck at home.

Carved Product Photography. Photo by Nathaniel Young.
To get started, product photography can really be a photo of anything showcasing a product. I encourage you to find some products around your place with interesting colors or textures to take pictures of. In this case, I am taking pictures of some cool products created by Carved. For full disclosure, you should know that Carved did send over some of these products featured in these photos free of charge. However, you should also know that they did not pay me to say anything and I was a customer of theirs long before we ever connected.
First, I looked around my home to find some items that would complement the products in both texture and color. First was the surface to put the photos on. Since our dining room table had a nice wooden texture, I thought it worked well with the wooden textures in the products. In addition, I also used a map as a background for a handful of the photos. I also used this topographical canvas style bag that helped add some nice texture too.


As for composition, I found that both top down and at 45 degrees worked out well. Top down table shots work well for these to show the layout of the different products; however, I think at 45 degrees was my favorite angle. 45 degrees in this case means your camera is angled about 45 degrees down (instead of perpendicular to the table) but also 45 degrees off to the side (instead of parallel to the products) which helps creates strong diagonal lines in the photo. By creating these diagonal lines in the photo, you are able to help draw your viewer through the photo easily in my opinion. In addition, I think having these diagonal lines running through your photo helps just generally create a more dynamic and interesting composition.
Additionally, if you are taking these product photos for a website or social media campaign, you should probably compose your photo a little wider than you actually want so that you can crop it a bit later. This is so that you can give yourself a little breathing room on the edges of the photo depending upon the image ratio that is needed. Also, it is a good idea to shoot both horizontals and verticals of the same image. It is often better to have a horizontal for a website banner, but for posting on social media, you might want a vertical version instead.
As for how I placed the products on the surface, I tried to create interesting grids or patterns. I tried to keep the products all equal distance from each other to create orderliness in the photos. In addition, I made sure all the items had enough breathing room around them so it would not feel too cluttered.

Product Photography Behind the Scenes. Photo by Nathaniel Young.
One of the most important parts of product photography just like any other photography is lighting. Regardless, there is generally two types of light that you should be aware of: hard and soft lighting. Hard light is characterized by more directional light with harsher or crisper shadows while soft light is characterized by the light sort of wrapping around your subject filling in all the dark shadows. The distance of your subject to the light source and the size of the light source will affect how hard or soft the light is. The closer the light source and larger the light source will render a softer type of light. Not saying that you cannot create awesome product photos with hard light, but in this case, I preferred to use a softer light source so that I would not have hard or deep shadows.
In order to find a soft light source, you could of course use a light with a big soft box. But this is not always necessary. You can find soft light by placing your subject next to a window during midday. This will give you nice soft reflected light coming through the window. If you are taking your photos outside, a cloudy day will act as a giant diffuser to help soften the sunlight too.
In the case for these photos, I used a mixture of all of the above. All of the indoor photos were taken on next to a big window on the dining room table using the natural sunlight coming in from the window. For some of the photos, I did use an artificial light source to fill in the shadows cast by the directional light from the window. However, if you don’t have an artificial light to do this, you can use a big white board to reflect the window light to achieve a similar effect.


Also, color is very important in any photo. There are many types of colors that work well together. Often times, complementing colors (or ones on the opposite side of the color wheel) can help create depth and color contrast in your photo. Another type of color theme is color keying. This is where you have similar shades of one color in the scene. For a number of the photos, I had a blue color theme in it. And in the first photo above, I also put a blue SSD which added to the color theme of blue in that photo.
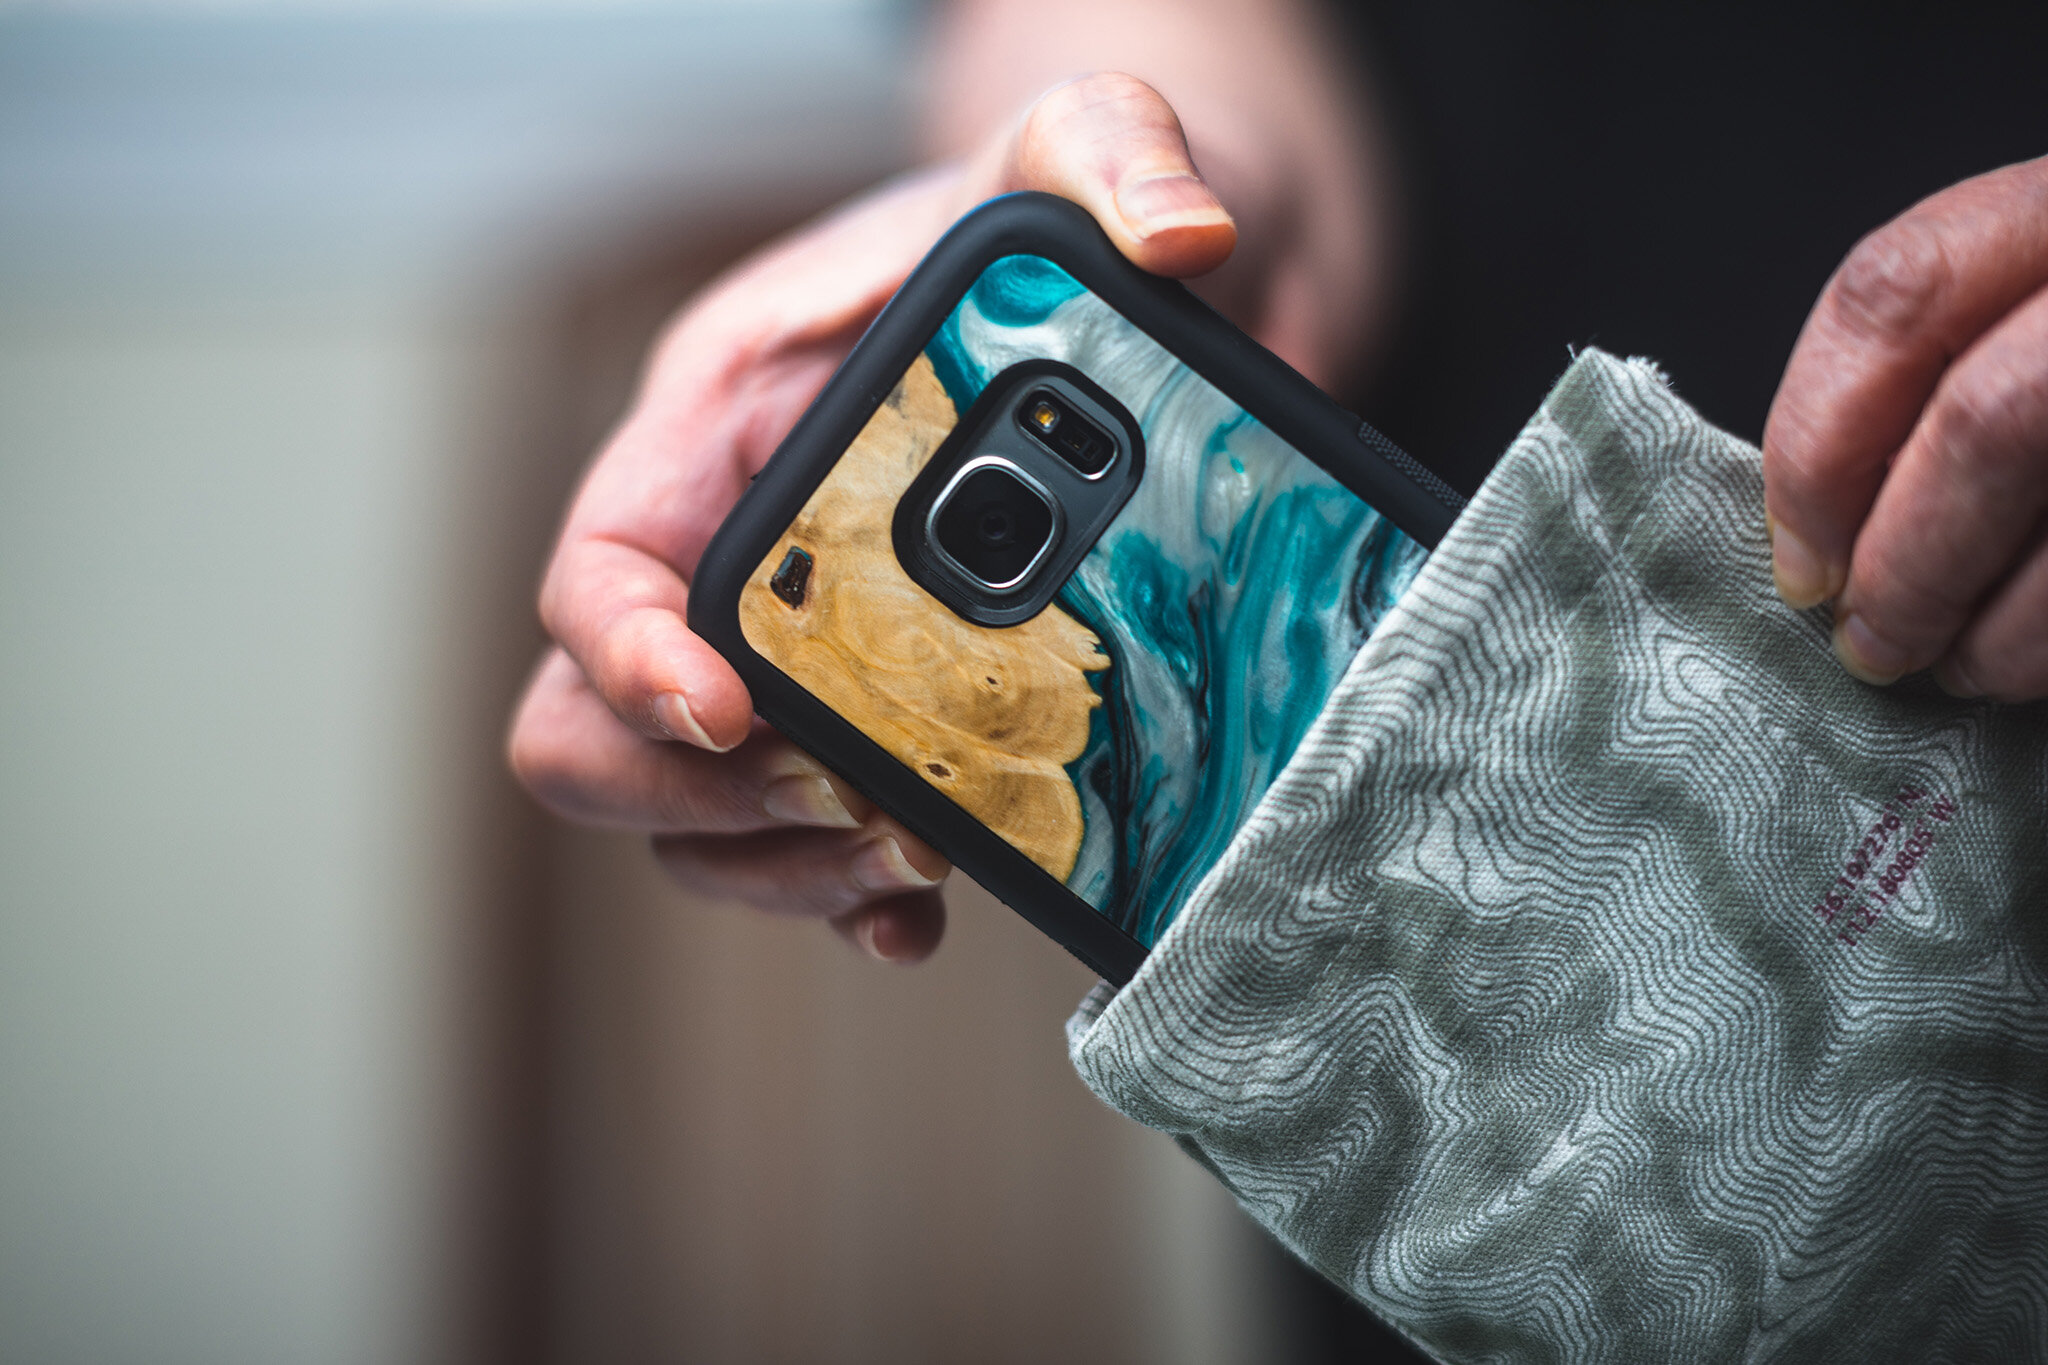
Carved Phone Case. Photo by Nathaniel Young.
Finally, I would encourage you to just experiment. Try a technique or style that you have not done before. It will not only help you learn a little bit more, but maybe you will discover something that you actually like. For me, I had this idea of capturing the phone being taken out of the bag to reveal the phone. It is much different than the rest of the photos I captured, but for a first attempt, I do not think it is half bad. So, if you have never tried product photography before, I encourage you to give it a shot.

Product Photography Behind the Scenes. Photo by Nathaniel Young.
As for the technical aspects, product photography is not really hard. It is more about being creative and thinking about your what you are shooting and how to compose it. You don’t need the fanciest camera or brightest aperture lens. In fact, most of the time I found myself wanting to stop down my lens so that I could get more in focus. It is hard to get everything in focus while shooting a small subject so close. Above is the behind the scenes photo for the first photo on this blog post (well the vertical version of it at least). If you can, setting up a tripod will allow you to keep a low ISO while being able to stop down your lens. Most of these photos, I ended up shooting handheld though (and using a higher ISO) because the mobility of moving yourself around without having to setup the tripod each time is nice.
Lastly, if you want, feel free to check out Carved and all their products (handmade in Indiana).
For all our club’s latest updates, please see our weekly announcements page here.